SSO with ADFS and JIT provisioning
Introduction
This article explains how to configure the SSO integration with a self-hosted Active Directory Federation Services (ADFS) server and BMS.
ADFS setup
Adding a new relying party trust
The connection between ADFS and BMS is defined using a relying party trust.
- Log into the server where ADFS is installed.
- Launch the ADFS Management application (click Start > Administrative Tools > ADFS Management) and select Trust Relationships > Relying Party Trustsnode.
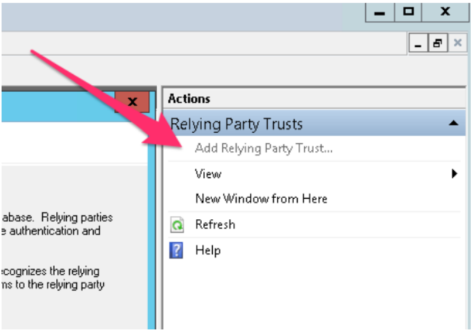
- Click Add Relying Party Trust from the Actions sidebar.
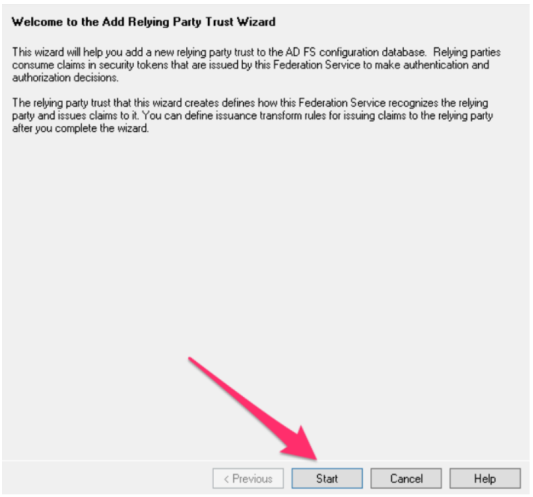
- Click Start on the Add Relying Party Trust wizard.
- On the Select Data Source screen, click Enter data about the relying party manually and click Next.
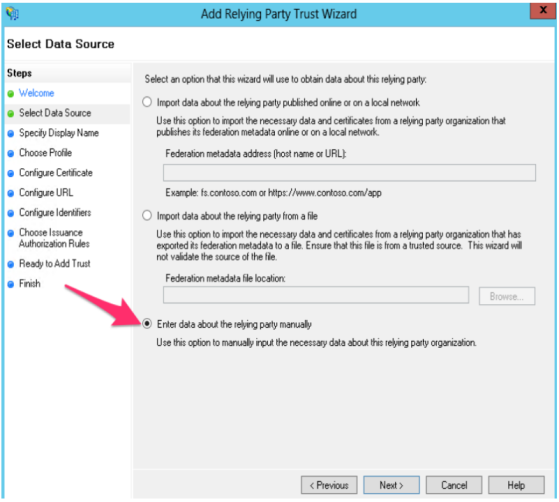
Providing Information for each screen in the Add Relying Party Trust wizard
- On the Specify Display Name screen, enter a Display name of your choice and any notes (e.g. BMS SSO), select ADFS profile, and then click Next.
- Skip the Configure Certificate screen by clicking Next.
- On the Configure URL, select the box labeled Enable Support for the SAML 2.0 WebSSO protocol. The URL will be https://{host-name}/saml/connect.aspx, replacing hostname with your BMS Domain. Note that there is no trailing slash at the end of the URL.
- On the Configure Identifiers screen, enter the Relying party trust identifier. This is the URL of your BMS Domain. The URL will be https://{host-name}. Click Next.
- Skip the Configure Multi-factor Authentication screen (unless you want to configure this) by clicking Next.
- Skip the Choose Issuance Authorization Rules screen by clicking Next.
- On the Ready to Add Trust screen, review your settings and then click Next.
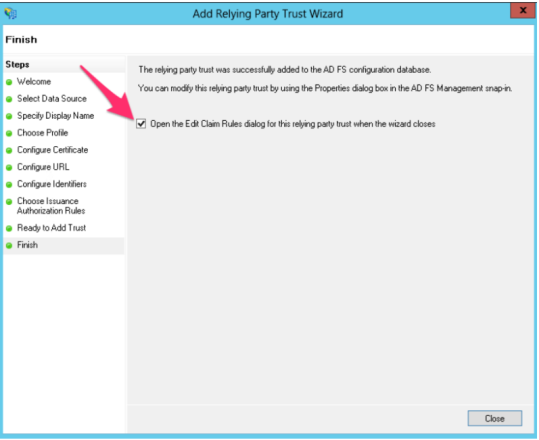
- On the final screen, make sure the Open the Edit Claim Rules dialog for this relying party trust when the wizard closes checkbox is selected and click Finish. This opens the claim rule editor.
Creating claim rules
After you create the relying party trust, you can create the claim rules and make minor changes that aren't set by the wizard.
- If the claim rules editor appears, click Add Rule. Otherwise, in the Relying Party Trusts list, right-click the relying party object that you created, click Edit Claims Rules, and then click Add Rule.
You should add multiple rules as follows:
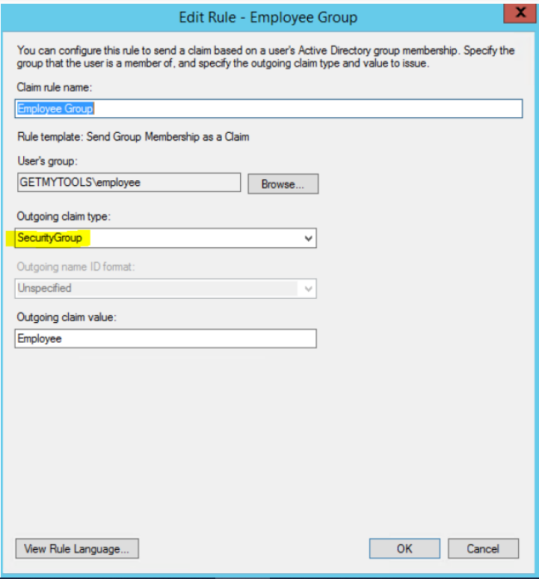
NOTE All outgoing claims should be the same as in the screenshots (companyName, SecurityGroup, username, lastname, firstname and email).
LDAP Attributes Rule to map all the required fields (firstname, lastname, username and email).
- On the Select Rule Template page, under Claim rule name, select Send LDAP Attributes as Claims from the list, and then click Next.
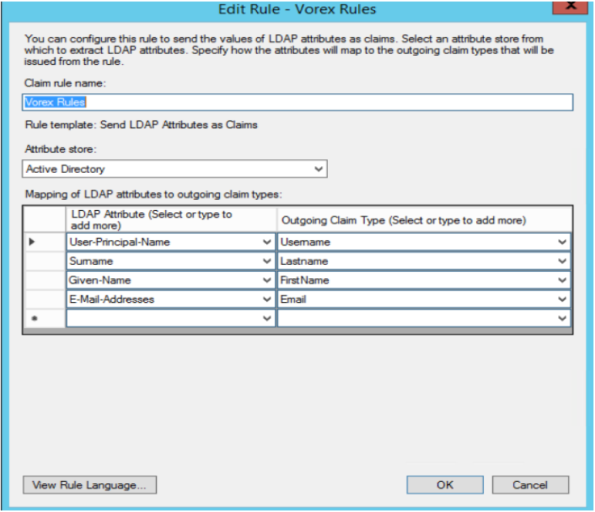
Custom rule to add the company name
- On the Select Rule Template page, under Claim rule name, select Custom Rule as Claim from the list, and then click Next.
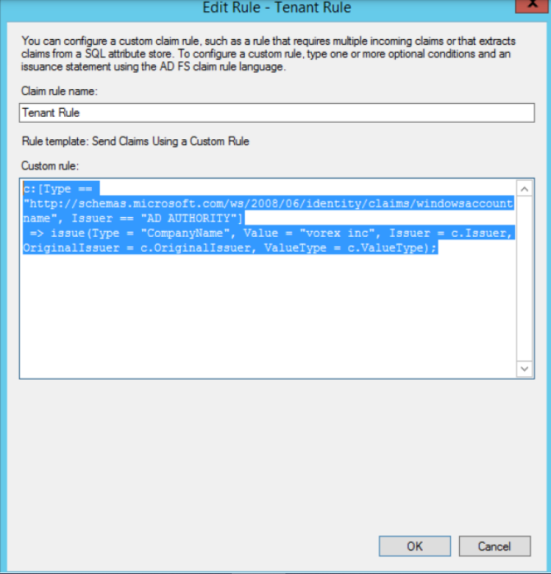
Custom rule template:
c:[Type == "http://schemas.microsoft.com/ws/2008/06/identity/claims/windowsaccountname",
Issuer == "AD AUTHORITY"] => issue(Type = "CompanyName", Value = "vorex inc", Issuer =
c.Issuer, OriginalIssuer = c.OriginalIssuer, ValueType = c.ValueType);
Some rules for group claims
- On the Configure Rule page, under Claim rule name type the display name for this rule. In employee’s group, click Browse and select a group. Under Outgoing claim type, select the desired claim type (should be SecurityGroup as mentioned above), and then under Outgoing Claim Value, type a value.
In PowerShell, enter the following command to make sure that both the message and assertion are signed:
Set-ADFSRelyingPartyTrust -SamlResponseSignature "MessageAndAssertion"
When you have multiple applications, the command must specify the target name. Then, the command would be:
Set-ADFSRelyingPartyTrust -TargetName "ApplicationName" -SamlResponseSignature "MessageAndAssertion"
The "ApplicationName" here should be substituted with the application name under Relying party trusts.
Downloading the certificate
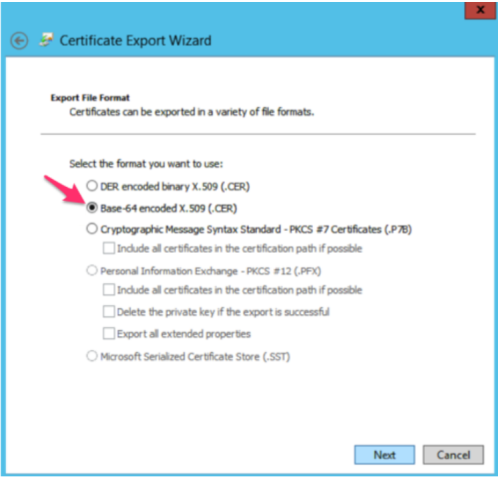
- Export the token-signing certificate with the ADFS Microsoft Management Console.
- When using the certificate exporting wizard, ensure you select Base-64 encoded X.509 (.CER) for the encoding format.
- Open the exported file in a text editor to get the certificate value.
BMS setup
In BMS, you should set up the system to enable SAML authentication and that can be achieved under Admin > My Company > Authentication.
- In the Single Sign On tab, upload the certificate downloaded previously, and set Enable Single Sign On via SAML to Yes, then click Save.
- Enter the Login Endpoint, the URL will be https://{host-name}/adfs/ls/IdpInitiatedSignOn.aspx.

This will enable BMS SAML authentication.
Creating mapping rules and enabling Just-in-Time provisioning
In the authentication page we need to enable JIT provisioning with mapping rules that match to the one found in AD.
- Set “Auto-Provision Users” to Yes.
- Create mapping rules that match with claim rules send from the IDP.
For example:
- If you add a user in AD member of employee’s group, then in BMS you should have a matching rule with same domain and security group.
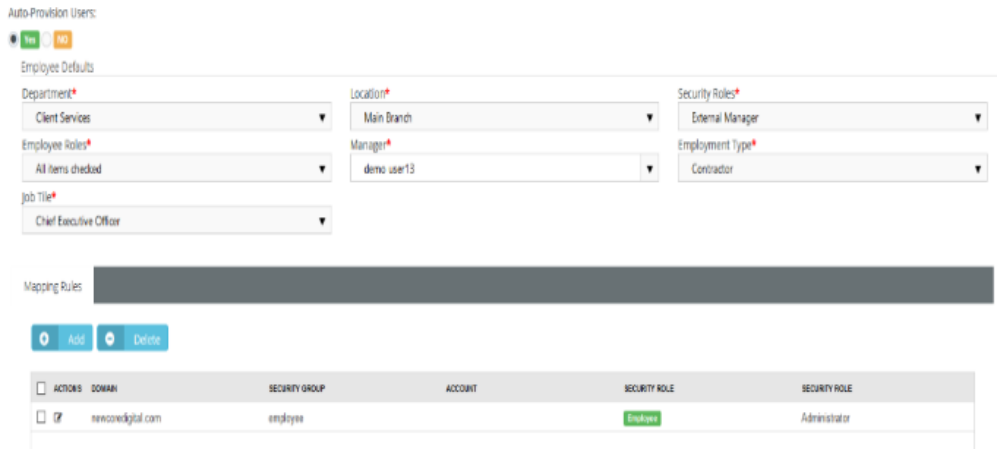
- If you add a user in AD member of client portal’s group, then in BMS you should have a matching rule with same domain and security group.

- If no rules match with BMS, the user will be created as external.
NOTE If user is member of multiple AD groups then we choose the first matching rule based on order.
ADFS application
Now log out from BMS, and you will be redirected to the gateway page.
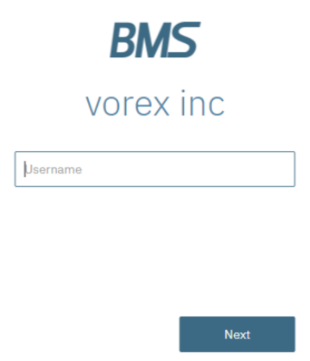
Enter username that exists in the AD and hit Next to directly open the ADFS authentication page, and then you will be redirected back to BMS with the SAML response.
The action will be done based on the following:
- If the user does not exist in BMS and if auto provision is enabled, then a new user will be created and logged in with the mapped role.
- If the user does not exist and if auto provision is disabled, then it will directly open the gateway page.
- If the user exists in BMS, then it will directly log the user into the system.


